Manufacturing Process of 3D Roofing Shingles
The production of three-dimensional roofing shingles involves a sophisticated process integrating raw material selection, precise shaping techniques, and rigorous quality control measures to ensure durability and aesthetic appeal. This process differs significantly from the production of traditional flat shingles, requiring specialized machinery and techniques to create the complex three-dimensional profiles.
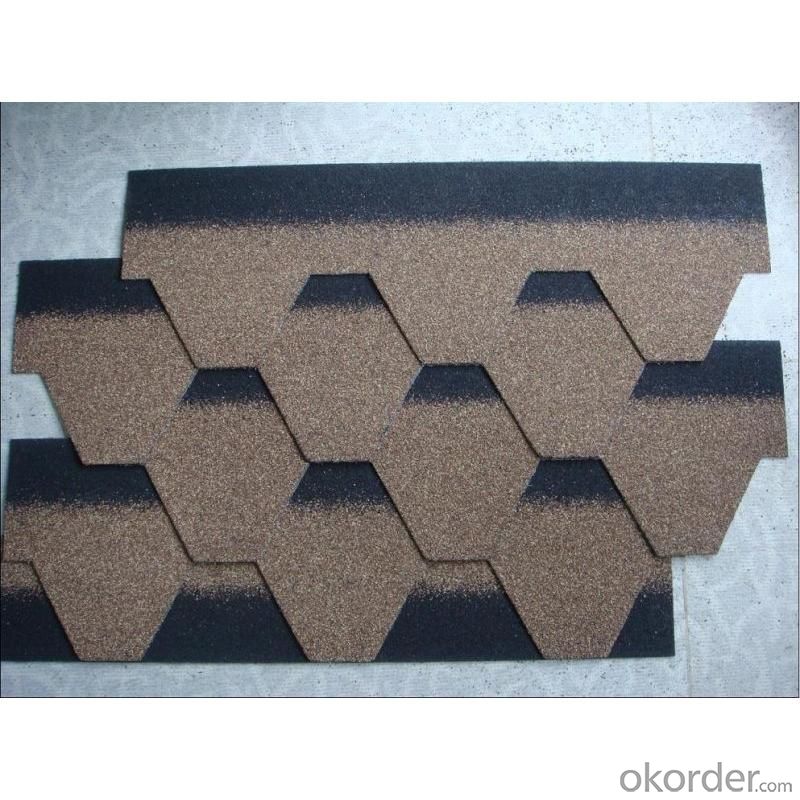
Three dimensional roofing shingles – The manufacturing process begins with the selection of high-quality raw materials, primarily asphalt and fiberglass. The asphalt, a petroleum-derived binder, provides waterproofing and flexibility, while the fiberglass mat acts as a reinforcing agent, providing structural integrity and dimensional stability. The precise composition of the asphalt and the type of fiberglass used are critical factors determining the shingle’s final properties, such as its resistance to weathering, impact, and fire.
Raw Material Preparation and Mixing
The initial step involves preparing the asphalt and fiberglass components. Asphalt is heated to a specific temperature to achieve optimal viscosity for proper mixing and coating. The fiberglass mats are then precisely cut and sized to the dimensions required for the desired shingle size and shape. The heated asphalt is then thoroughly mixed with various additives, including color pigments, stabilizers, and fillers, to achieve the desired color, durability, and flexibility. This mixture is carefully monitored to maintain consistent quality and prevent inconsistencies in the final product.
Shaping and Forming of 3D Shingles
Several technologies are employed to shape the three-dimensional profiles of these shingles. One common method utilizes specialized molding machines that press the asphalt-fiberglass composite into pre-designed molds. These molds create the intricate three-dimensional shapes and textures that define the aesthetic qualities of the shingle. Another method involves extrusion, where the composite material is forced through a die with a complex shape to create the desired profile. The choice of shaping technology depends on factors such as the complexity of the shingle design, production volume, and cost considerations. High-pressure molding, for instance, is often favored for intricate designs while extrusion is more suitable for high-volume production of simpler shapes.
Curing and Cooling
Once shaped, the shingles are transferred to a curing and cooling area. This crucial step allows the asphalt to solidify and the shingle to retain its shape. Precise temperature and humidity control are maintained throughout this process to prevent warping, cracking, or other defects. The duration of the curing process depends on the specific asphalt formulation and the desired level of hardness and flexibility. Improper curing can significantly affect the shingle’s performance and lifespan.
Quality Control and Inspection
Rigorous quality control measures are implemented throughout the manufacturing process. Regular inspections are conducted at each stage, from raw material testing to the final product inspection. This ensures that the shingles meet the required specifications for durability, aesthetics, and performance. Defective shingles are identified and rejected to maintain high quality standards. This rigorous quality control process is crucial for ensuring the long-term performance and reliability of the roofing system.
Packaging and Distribution
After passing quality control, the shingles are packaged and prepared for distribution. Typically, they are bundled together in protective packaging to prevent damage during transportation and handling. Packaging designs are often optimized for efficient storage and transportation, minimizing waste and ensuring the shingles arrive at their destination in pristine condition. This final step ensures that the high-quality product reaches the end-user ready for installation.
Comparison with Traditional Flat Shingles
The manufacturing process of 3D shingles differs significantly from that of traditional flat shingles. Flat shingles generally involve a simpler process, typically involving the saturation of fiberglass mats with asphalt and then cutting them into rectangular shapes. 3D shingles, however, require specialized molding or extrusion equipment and more intricate processes to create their complex shapes. The increased complexity results in higher manufacturing costs for 3D shingles, but this is often offset by their enhanced aesthetic appeal and potentially improved performance characteristics, such as enhanced wind resistance.
Manufacturing Process Flowchart
| Stage | Process | Technology | Quality Control |
|---|---|---|---|
| Raw Material Preparation | Asphalt heating, fiberglass cutting, additive mixing | Mixers, Cutters, Heating Systems | Material testing, viscosity checks |
| Shaping and Forming | Molding or extrusion of asphalt-fiberglass composite | Molding machines, Extrusion lines | Dimensional accuracy checks |
| Curing and Cooling | Controlled environment for asphalt solidification | Temperature and humidity controlled chambers | Visual inspection for defects |
| Quality Control and Inspection | Visual and dimensional inspections, performance testing | Inspection equipment, testing labs | Defect identification and rejection |
| Packaging and Distribution | Bundling and protective packaging | Packaging machinery, logistics | Final product inspection |
Material Composition and Properties
Three-dimensional roofing shingles offer a unique blend of durability, aesthetic appeal, and weather resistance, largely determined by their material composition. Understanding the properties of these materials is crucial for selecting the right shingles for a specific climate and architectural style. This section will explore the common materials used, their performance characteristics, and a comparison of their overall lifespan, cost, and environmental impact.
The most common materials used in 3D shingle construction are asphalt, polymer-modified asphalt, and composite materials incorporating recycled content. Each offers a distinct set of advantages and disadvantages.
Asphalt Shingles
Asphalt shingles remain a popular choice due to their affordability and relatively easy installation. Standard asphalt shingles consist of a fiberglass mat saturated with asphalt and coated with mineral granules for weather protection and color. However, their lifespan is generally shorter compared to other 3D shingle options, and they may be less resistant to extreme weather conditions, such as high winds and heavy snowfall. The aesthetic appeal can be limited compared to more textured and dimensional alternatives.
Polymer-Modified Asphalt Shingles
Polymer-modified asphalt shingles enhance the performance of standard asphalt shingles by incorporating polymers like styrene-butadiene-styrene (SBS) or atactic polypropylene (APP). These polymers improve the shingle’s flexibility, durability, and resistance to temperature extremes. They offer superior weather resistance, particularly against high winds and hail, resulting in a longer lifespan compared to standard asphalt shingles. The added polymers also often contribute to a more refined aesthetic appearance.
Composite Shingles, Three dimensional roofing shingles
Composite shingles offer a sustainable alternative, often incorporating recycled materials such as plastic and rubber. These shingles provide excellent durability and weather resistance, often surpassing the performance of standard asphalt shingles. The composition can vary significantly, resulting in a range of aesthetic options. Some composite shingles mimic the appearance of natural materials like wood or slate, providing a high-end aesthetic appeal. The use of recycled content also contributes to a lower environmental impact compared to traditional asphalt shingles.
Material Comparison Table
The following table summarizes the key performance characteristics of different 3D shingle materials. It’s important to note that the actual lifespan, cost, and environmental impact can vary based on specific product formulations, installation practices, and regional factors.
| Material | Lifespan (Years) | Cost (Relative) | Environmental Impact (Relative) |
|---|---|---|---|
| Standard Asphalt | 15-20 | Low | Moderate |
| Polymer-Modified Asphalt | 25-30 | Medium | Moderate |
| Composite (Recycled Content) | 30-50 | High | Low |
Note: Cost and environmental impact are relative comparisons. Actual costs and environmental impacts vary significantly depending on manufacturer, specific product, and regional factors. Lifespan estimates are based on average performance under typical conditions and may vary due to weather exposure and installation quality.
Installation Techniques and Best Practices
Installing three-dimensional roofing shingles requires precision and attention to detail to ensure a long-lasting, watertight roof. Proper installation techniques, coupled with the use of appropriate underlayment and ventilation, are crucial for maximizing the lifespan and performance of the roof. This section details a step-by-step guide for successful 3D shingle installation, highlighting best practices for a professional finish.
Necessary Tools and Safety Precautions
Before commencing installation, gather all necessary tools and ensure adherence to safety protocols. This minimizes risks and ensures a smooth installation process. Improper use of tools can lead to accidents, damage to materials, and ultimately, a compromised roof.
- Tools: Measuring tape, roofing nails, hammer, utility knife, roofing shovel, chalk line, safety glasses, work gloves, ladder (appropriate height and stability), and possibly a roofing nailer for increased efficiency.
- Safety Precautions: Always wear appropriate personal protective equipment (PPE), including safety glasses and work gloves. Use a stable ladder and maintain three points of contact at all times. Work with a partner when possible for heavier lifting and to enhance safety. Be mindful of overhead power lines and other potential hazards. Ensure the work area is clear of debris and obstacles.
Step-by-Step Installation Guide
Following a structured approach ensures a consistent and professional installation. Each step plays a vital role in achieving a watertight and aesthetically pleasing roof. Skipping steps or neglecting details can lead to costly repairs later.
- Preparation: Inspect the existing roof deck for damage. Repair any damaged areas before starting installation. Ensure the roof deck is clean and free of debris. Establish a consistent starting point for shingle placement, often the lowest edge of the roof.
- Underlayment Installation: Apply a quality underlayment, such as synthetic felt or rubberized membrane, according to the manufacturer’s instructions. This provides an extra layer of protection against water penetration. Overlap the underlayment sheets by a minimum of 4 inches, sealing any seams with roofing cement.
- Starter Course: Install the starter course of shingles along the eaves. This provides a straight, even base for the remaining shingles. Ensure proper alignment and secure nailing.
- Shingle Installation: Begin installing the 3D shingles, aligning them with the starter course. Maintain consistent spacing and overlap as specified by the manufacturer. Secure each shingle with the appropriate number of nails, driven straight and firmly into the roof deck.
- Ridge and Hip Installation: Install ridge and hip caps to finish the roofline. These specialized shingles provide a weather-resistant seal at the roof’s highest points. Follow the manufacturer’s instructions for proper alignment and nailing.
- Flashing: Install flashing around chimneys, vents, and other roof penetrations to prevent water leakage. Proper flashing is critical for a watertight roof. Seal all joints with roofing cement.
- Final Inspection: Perform a thorough inspection of the entire roof, checking for any loose shingles, gaps, or damaged areas. Repair any imperfections before completing the project.
Importance of Proper Underlayment and Ventilation
The use of proper underlayment and adequate ventilation is crucial for extending the lifespan of the roof and preventing premature deterioration. These elements work in conjunction to protect the roof deck from moisture damage and maintain optimal temperatures within the attic space.
Underlayment acts as a secondary barrier against water penetration, providing added protection in case of shingle failure or wind-driven rain. Proper ventilation allows for the escape of moisture, preventing condensation and the growth of mold and mildew within the attic. This prevents structural damage and extends the life of the roofing system. Inadequate ventilation can lead to significant problems such as ice damming in colder climates.
Best Practices for Achieving a Professional and Watertight Finish
Achieving a professional and watertight finish requires meticulous attention to detail throughout the installation process. This includes proper shingle alignment, secure nailing, and careful sealing of all seams and joints.
Consistent shingle alignment and proper overlap are crucial for preventing water penetration. Each shingle should be securely nailed, ensuring that the nails are driven straight and firmly into the roof deck. All seams and joints should be sealed with high-quality roofing cement to prevent water leakage. Regularly inspect your work and address any issues promptly. A professional finish is a result of careful planning, proper execution, and attention to even the smallest details.
Aesthetic Considerations and Design Options
Three-dimensional roofing shingles offer a wide array of aesthetic possibilities, significantly impacting a building’s overall appearance and curb appeal. The careful selection of shingle design can elevate a home’s architectural style and enhance its market value. This section explores the various design options available, focusing on color, texture, profile, and their influence on the final aesthetic.
The visual impact of 3D shingles stems from a combination of factors. Color choices range from traditional earth tones to vibrant, modern hues, allowing for seamless integration with existing architectural styles or bold statements of individuality. Texture, often mimicking natural materials like wood or slate, adds depth and visual interest. Finally, the profile – the three-dimensional shape of the shingle itself – creates shadows and highlights, further enhancing the roof’s visual complexity.
Color and Texture Options
The palette of colors available for 3D shingles is extensive, allowing for a wide range of design possibilities. Earthy tones such as browns, grays, and greens blend seamlessly with natural surroundings, while bolder colors like reds, blues, and blacks create a more dramatic effect. Textures can range from smooth and sleek to rough and rustic, mimicking the look of natural materials like wood shakes, slate tiles, or even clay tiles. The interplay of color and texture contributes significantly to the overall aesthetic appeal. For example, a dark gray shingle with a textured surface can create a sophisticated, modern look, while a warm brown shingle with a wood-like texture can evoke a more traditional, rustic feel.
Profile and Architectural Style
The three-dimensional profile of the shingle is a crucial design element. Different profiles create varying degrees of shadow and highlight, influencing the perceived texture and depth of the roof. A low-profile shingle might suit a minimalist modern home, while a high-profile, deeply textured shingle could complement a more traditional or Victorian-style building. The shingle profile should complement the building’s architectural style to create a cohesive and visually appealing whole. For instance, a steeply pitched roof on a colonial-style home might be enhanced by shingles with a pronounced, dimensional profile, while a flatter roof on a contemporary home might be better suited to a sleek, low-profile shingle.
Impact on Curb Appeal and Property Value
The aesthetic appeal of a home’s roof significantly contributes to its overall curb appeal and, consequently, its market value. Well-chosen 3D roofing shingles can dramatically enhance a home’s exterior, making it more visually appealing and attractive to potential buyers. The use of high-quality materials and sophisticated designs can increase the perceived value of the property, potentially leading to a higher resale price. For example, a home with a beautifully designed roof featuring high-quality 3D shingles is likely to command a higher price than a comparable home with a standard, less visually appealing roof.
Visual Representations of 3D Shingle Designs
Imagine a Spanish-style villa with a low-pitched terracotta roof. The 3D shingles, a rich, reddish-brown, have a slightly textured surface mimicking clay tiles, with subtle variations in shade creating a natural, sun-baked appearance. The profile is relatively low, maintaining the elegance of the architectural style.
Next, picture a contemporary home with a sharp, angular roofline. The 3D shingles are a sleek, charcoal gray, with a smooth, almost metallic texture. The profile is minimal, emphasizing the clean lines of the architecture. The dark color provides a striking contrast against the lighter-colored walls.
Finally, consider a traditional farmhouse with a steep, gabled roof. The 3D shingles are a warm, medium brown with a pronounced wood-shake texture. The profile is high, creating deep shadows and highlights that accentuate the roof’s texture and the three-dimensional effect. The color and texture contribute to the rustic charm of the farmhouse.
Cost Analysis and Lifecycle Value
Choosing a roofing material involves careful consideration of both upfront costs and long-term expenses. Three-dimensional roofing shingles offer a unique blend of aesthetics and durability, but understanding their cost-effectiveness requires a comprehensive analysis of initial investment, maintenance needs, and overall lifespan. This section will compare the cost of 3D shingles to other popular roofing options, examine potential maintenance and repair costs, and ultimately calculate the lifecycle value to help you make an informed decision.
The initial cost of 3D roofing shingles is generally higher than traditional asphalt shingles but often lower than higher-end options like slate or clay tiles. The price variance depends on factors such as shingle material (e.g., composite, metal), complexity of design, and the size and pitch of the roof. However, the premium paid upfront is often offset by the material’s superior longevity and reduced maintenance needs.
Comparison of Initial Costs
The table below compares the estimated initial costs per square (100 square feet) for different roofing materials. These are average figures and can vary significantly based on location, labor costs, and material specifics. For example, a complex 3D design will naturally cost more than a simpler one.
| Roofing Material | Estimated Cost per Square (USD) | Lifespan (Years) | Notes |
|---|---|---|---|
| Asphalt Shingles (3-tab) | $75 – $150 | 15-20 | Least expensive option, requires more frequent replacements. |
| Asphalt Shingles (Architectural) | $150 – $300 | 20-30 | Improved durability and aesthetics compared to 3-tab. |
| 3D Roofing Shingles (Composite) | $250 – $450 | 30-50 | Higher initial cost, but longer lifespan and reduced maintenance. |
| Clay Tiles | $400 – $800 | 50-100+ | Extremely durable but significantly more expensive. |
| Slate Tiles | $800 – $1500+ | 75-100+ | Premium material with exceptional longevity. |
Long-Term Cost Implications
While the initial cost is a significant factor, the long-term cost implications of a roofing system are equally important. This includes maintenance, repairs, and eventual replacement. 3D shingles, due to their robust construction and superior weather resistance, generally require less maintenance and fewer repairs compared to other roofing materials. This translates to significant cost savings over the material’s lifespan.
Lifecycle Value Calculation
The lifecycle value considers the initial cost, maintenance costs, repair costs, and the lifespan of the roofing material. A simple calculation for comparing lifecycle costs is to divide the total cost (initial cost + maintenance + repairs) by the lifespan of the roofing material. For example, let’s consider a 2000 square foot roof.
Example:
Assume a 3D shingle roof costs $300 per square and lasts 40 years, with minimal maintenance and repair costs estimated at $1000 over the 40 years. The total cost would be ($300/sq ft * 2000 sq ft) + $1000 = $601000. The annualized cost would be $601000 / 40 years = $15025 per year. Compare this to an asphalt shingle roof with a 20-year lifespan and higher replacement cost. The lower annualized cost of the 3D shingles demonstrates their long-term value.
The lifecycle value calculation helps determine the true cost-effectiveness of a roofing material by considering all expenses over its entire lifespan.
Environmental Impact and Sustainability
The environmental impact of roofing materials is a growing concern, influencing both the construction industry and consumer choices. Three-dimensional roofing shingles, while offering aesthetic and performance advantages, necessitate a thorough evaluation of their environmental footprint across their entire lifecycle, from raw material extraction to disposal. This section will analyze the environmental impact of 3D shingles, examining their manufacturing processes, material composition, and comparison to alternative roofing solutions.
The manufacturing and installation of 3D roofing shingles involve several stages with varying environmental impacts. Energy consumption during manufacturing is a significant factor, particularly in the production of composite materials and the processes involved in creating the three-dimensional profile. Transportation of materials from manufacturing facilities to construction sites contributes to greenhouse gas emissions. Installation itself generates waste, including packaging materials and potentially shingle scraps. The longevity of the shingles and their eventual disposal or recycling also contribute to the overall environmental impact.
Manufacturing Processes and Associated Emissions
The manufacturing process of 3D roofing shingles often involves the use of energy-intensive equipment and processes. The creation of the complex three-dimensional shapes requires specialized machinery and tooling, resulting in higher energy consumption compared to the production of traditional flat shingles. Furthermore, the use of certain composite materials may involve the emission of volatile organic compounds (VOCs) during the manufacturing process. Minimizing these emissions through the adoption of cleaner production technologies and stringent emission controls is crucial for reducing the environmental footprint. For example, the adoption of renewable energy sources to power manufacturing facilities can significantly decrease reliance on fossil fuels and reduce carbon emissions.
Recycled Materials and Sustainable Manufacturing Practices
The 3D shingle industry is increasingly incorporating recycled materials into its production processes. Post-consumer recycled plastics and reclaimed rubber are being used in some composite shingle formulations, reducing reliance on virgin materials and diverting waste from landfills. Sustainable manufacturing practices, such as water conservation techniques and waste reduction strategies, are also being implemented by some manufacturers. The use of recycled materials reduces the demand for new resources, lowering the overall environmental impact. For instance, a manufacturer might utilize recycled polyethylene terephthalate (PET) plastic bottles in their shingle composition, thereby diverting plastic waste from landfills and reducing the consumption of virgin petroleum-based materials.
Comparison with Other Roofing Options
The environmental footprint of 3D shingles must be compared with that of other roofing materials, such as asphalt shingles, metal roofing, and tile roofing. Life cycle assessments (LCAs) provide a comprehensive evaluation of the environmental impacts of each roofing option across its entire lifespan. These assessments consider factors such as energy consumption during manufacturing, transportation, installation, and disposal; material sourcing; and greenhouse gas emissions. While 3D shingles might have a higher upfront energy consumption due to their complex manufacturing process, their longer lifespan compared to some other roofing materials could potentially offset this impact over time. A comprehensive LCA comparing 3D shingles to other common roofing options is needed to provide a definitive answer regarding their relative environmental impact. For example, a comparative LCA might show that while 3D shingles have a slightly higher embodied carbon than asphalt shingles, their longer lifespan (potentially 50 years versus 20 years) could result in a lower overall carbon footprint over their operational lifetime.
Contribution to Sustainable Building Design
Choosing 3D roofing shingles can contribute to a more sustainable building design in several ways. The longer lifespan of these shingles reduces the frequency of roof replacements, minimizing waste generation and the associated environmental impacts. The use of recycled materials in their composition further contributes to resource conservation. Furthermore, some 3D shingle designs incorporate features that improve energy efficiency, such as increased reflectivity to reduce heat absorption, potentially leading to lower energy consumption for building cooling. For instance, a building incorporating high-albedo 3D shingles could demonstrably reduce its cooling energy consumption, contributing to a lower overall carbon footprint for the structure.
Maintenance and Repair Procedures
Proper maintenance is crucial for extending the lifespan and preserving the aesthetic appeal of three-dimensional roofing shingles. A proactive approach to maintenance minimizes the risk of costly repairs and ensures the long-term performance of your roof. Regular inspections and timely repairs will protect your investment and safeguard your home.
Regular Maintenance Schedule for Three-Dimensional Roofing Shingles
A comprehensive maintenance schedule should be implemented to ensure the longevity of your 3D roofing shingles. This schedule should include both visual inspections and more thorough examinations, depending on factors such as climate and environmental conditions.
Regular Inspection and Cleaning
Regular visual inspections should be performed at least twice a year, ideally in spring and autumn. During these inspections, check for any signs of damage, such as loose or missing shingles, cracks, curling, or discoloration. Clean the roof using a soft-bristled brush and a garden hose with a low-pressure nozzle to remove debris like leaves, twigs, and moss. Avoid high-pressure washing, as this can damage the shingles. For stubborn stains, a mild detergent solution can be used, followed by thorough rinsing with clean water. Safety precautions, including the use of a safety harness when working at heights, are paramount.
Identifying and Repairing Common Issues
Promptly addressing any identified issues is essential to prevent further damage and potential leaks. The following procedures Artikel how to handle common problems.
Leak Repair
Leaks often originate from damaged or improperly installed shingles. To repair a leak, first locate the source by carefully examining the roof for signs of moisture penetration. Once identified, the damaged shingle should be carefully removed. The underlying felt or underlayment should be checked for damage. Any damaged material should be replaced. A new shingle, matching the existing ones, should then be installed using appropriate adhesive and fasteners. If the leak is extensive or involves multiple shingles, professional assistance should be sought.
Crack Repair
Minor cracks in the shingles can often be repaired using a high-quality roofing sealant. Clean the cracked area thoroughly before applying the sealant, ensuring a good bond. Follow the manufacturer’s instructions for application and drying time. For larger cracks or significant damage, replacement of the affected shingle is recommended.
Damage Repair (e.g., from impact)
Damage caused by impacts, such as falling branches or hail, may require more extensive repairs. Inspect the area thoroughly for damage beyond the immediate impact zone. If only a single shingle is damaged, replacement is usually sufficient. However, if the underlying layers are also compromised, a more extensive repair involving several shingles may be necessary. In cases of significant damage, professional assistance is advisable.
Cleaning and Protection of 3D Shingles
Regular cleaning helps prevent the buildup of debris and algae, which can damage the shingles and shorten their lifespan. Avoid using harsh chemicals or abrasive cleaners, which can damage the shingle surface. Consider applying a specialized roof sealant every few years to protect the shingles from the elements and extend their lifespan. This sealant creates a protective barrier against UV radiation, moisture, and other environmental factors. The sealant should be applied according to the manufacturer’s instructions.
Safety Recommendations
Roof maintenance involves working at heights and requires strict adherence to safety protocols. Always use appropriate safety equipment, such as a safety harness, sturdy ladder, and gloves. Never work on the roof during inclement weather or high winds. If you are uncomfortable working at heights or lack the necessary experience, it’s best to hire a qualified roofing professional.
Comparison with Traditional Roofing Materials: Three Dimensional Roofing Shingles
Choosing the right roofing material involves careful consideration of various factors, including cost, durability, aesthetics, and environmental impact. This section compares three-dimensional roofing shingles with other popular options to help you make an informed decision. We will examine asphalt shingles, clay tiles, and metal roofing, highlighting their respective advantages and disadvantages.
This comparison focuses on key characteristics to facilitate a clear understanding of the differences and similarities between three-dimensional shingles and other common roofing materials. The following table summarizes the findings.
Comparative Analysis of Roofing Materials
| Characteristic | 3D Roofing Shingles | Asphalt Shingles | Clay Tiles | Metal Roofing |
|---|---|---|---|---|
| Cost | Generally higher initial cost than asphalt, comparable to or slightly less than clay, and more expensive than metal. | Lowest initial cost. | Moderate to high initial cost, depending on type and quality. | Moderate to high initial cost, varying significantly based on material (e.g., aluminum, steel, copper). |
| Durability | High durability, resistant to impact and weathering, offering a long lifespan with proper installation. Expected lifespan is comparable to clay tiles. | Moderate durability; lifespan is typically 15-30 years, susceptible to damage from hail and strong winds. | Very high durability; lifespan can exceed 50 years, highly resistant to weather damage. | Very high durability; lifespan often exceeds 50 years, highly resistant to weather, fire, and impact damage. |
| Aesthetics | Offers unique three-dimensional texture and visual depth, providing a modern and sophisticated look. Variety of colors and styles available. | Wide variety of colors and styles available, but generally considered less visually appealing than other options, particularly high-end applications. | Classic and elegant appearance; offers a timeless aesthetic, but limited color options. | Clean and modern look; available in various colors and profiles, offering versatility in design. |
| Environmental Impact | Environmental impact varies depending on the manufacturing process and materials used. Some manufacturers utilize recycled materials and sustainable practices. | Significant environmental impact due to petroleum-based composition and manufacturing processes. Disposal often involves landfill. | Relatively low environmental impact due to the natural material and long lifespan. However, energy-intensive manufacturing and transportation. | Environmental impact varies based on the material used. Recycled metal options are more sustainable. Manufacturing and transportation have environmental consequences. |
Technological Advancements in 3D Shingle Design
The design and manufacturing of three-dimensional roofing shingles have undergone significant advancements in recent years, driven by the demand for enhanced performance, aesthetics, and sustainability. These improvements encompass material science, manufacturing processes, and design principles, leading to products that offer superior durability, weather resistance, and energy efficiency.
The 3D shingle market is witnessing the emergence of several key trends. These innovations are pushing the boundaries of traditional roofing solutions, resulting in more sophisticated and efficient products. This section will explore these advancements, highlighting their impact on the overall performance and sustainability of 3D shingles.
Advanced Materials in 3D Shingle Construction
The incorporation of new materials is a key driver of innovation in 3D shingle technology. For example, the use of polymer-modified asphalt blends enhances the shingles’ flexibility and resistance to cracking, extending their lifespan. Similarly, the integration of recycled materials, such as post-consumer plastics, contributes to the environmental sustainability of the product. Furthermore, the development of self-healing polymers promises to further improve durability by automatically repairing minor surface damage. These advancements demonstrate a clear shift towards more resilient and environmentally conscious materials.
Improved Manufacturing Processes for Enhanced Efficiency
Modern manufacturing processes play a crucial role in the quality and cost-effectiveness of 3D shingles. The adoption of automated production lines, coupled with advanced robotics, has significantly improved manufacturing efficiency and reduced production times. Furthermore, precision cutting and molding techniques ensure consistent product quality and dimensional accuracy. These advancements contribute to a more streamlined and cost-effective manufacturing process, ultimately benefiting consumers.
Innovative Design Features for Enhanced Performance
Recent advancements in 3D shingle design have focused on improving performance characteristics. For instance, the incorporation of enhanced interlocking mechanisms provides superior wind resistance and prevents shingle slippage during storms. Similarly, improved ventilation channels within the shingle structure help to reduce heat buildup and enhance the longevity of the roofing system. These design features directly contribute to increased durability and reduced maintenance costs over the life of the roof.
Technological Milestones in 3D Shingle Development
1990s: Early experimentation with three-dimensional shingle designs, primarily focusing on improved aesthetics.
Early 2000s: Introduction of polymer-modified asphalt blends to enhance durability and weather resistance.
Mid-2000s: Development of more sophisticated interlocking mechanisms for improved wind resistance.
Late 2000s: Increased focus on incorporating recycled materials to improve environmental sustainability.
2010s – Present: Advancements in manufacturing processes, including automation and precision cutting, lead to higher efficiency and product consistency. Research into self-healing polymers and other advanced materials continues. Integration of smart technologies, such as embedded sensors for monitoring roof condition, begins to emerge.
Case Studies of 3D Shingle Installations
This section presents several case studies illustrating the successful application of three-dimensional roofing shingles on diverse building types. We examine the installation processes, challenges encountered, and feedback from both homeowners and contractors. These examples highlight the versatility and effectiveness of 3D shingles in various contexts.
Residential Installation: A Victorian-Style Home
This case study focuses on the installation of 3D asphalt shingles on a Victorian-style home in a historic district. The homeowner desired a roofing material that would enhance the home’s architectural details while providing long-term durability. The installation team faced challenges due to the home’s complex roofline, requiring precise measurements and careful shingle placement to maintain the aesthetic integrity of the design. Despite these challenges, the installation was completed successfully, resulting in a visually stunning and highly durable roof. Homeowner feedback emphasized the enhanced curb appeal and the minimal maintenance required. The contractor noted the importance of experienced installers for complex projects like this, highlighting the need for specialized training in handling 3D shingles on intricate roof structures.
“The 3D shingles really brought out the character of our Victorian home. They look amazing, and we haven’t had any issues with leaks or damage even after a couple of harsh winters.” – Homeowner, Victorian-Style Home
Commercial Installation: A Modern Office Building
This case study details the application of 3D metal shingles on a modern office building. The project presented challenges related to the building’s large surface area and the need for efficient installation to minimize disruption to business operations. The installation team utilized specialized equipment and techniques to expedite the process while maintaining high-quality workmanship. The metal shingles’ lightweight nature facilitated a faster installation compared to traditional materials. The building owner reported high satisfaction with the durability and aesthetic appeal of the 3D metal shingles, emphasizing the low maintenance requirements and the enhanced visual appeal compared to traditional flat roofing materials. The contractor highlighted the importance of proper planning and coordination to ensure a smooth and timely installation on large-scale commercial projects.
“The 3D metal shingles not only look fantastic on our modern office building, but they’ve also proven to be incredibly durable and weather-resistant. We’re very pleased with the choice.” – Building Owner, Modern Office Building
Renovation Project: A Ranch-Style Home
This case study focuses on the use of 3D composite shingles during a roof renovation on a ranch-style home. The original asphalt shingles were nearing the end of their lifespan, and the homeowner sought a durable and aesthetically pleasing replacement. The installation process was relatively straightforward, with the lightweight nature of the composite shingles making handling and placement easier. However, the team encountered minor challenges in matching the color and texture of the new shingles to the existing siding and trim. This was addressed through careful color selection and attention to detail during installation. The homeowner expressed satisfaction with the improved energy efficiency and the low maintenance requirements of the new roofing system. The contractor emphasized the importance of accurate color matching to maintain the overall aesthetic coherence of the home’s exterior.
“The new 3D composite shingles have completely transformed the look of our ranch house. They’re so much more attractive than the old asphalt shingles, and we’re confident they’ll last for years to come.” – Homeowner, Ranch-Style Home
Essential FAQs
What is the average lifespan of 3D roofing shingles?
The lifespan varies depending on the material used and climate conditions, but generally ranges from 30 to 50 years, often exceeding that of traditional asphalt shingles.
Are 3D shingles more resistant to extreme weather conditions?
Many 3D shingle materials offer superior resistance to high winds, heavy snow, and hail compared to traditional shingles, due to their interlocking design and robust construction.
How difficult are 3D shingles to install?
Installation requires specialized knowledge and skill. While the process is similar to traditional shingle installation, the three-dimensional design necessitates careful attention to detail to ensure a proper seal and prevent leaks.
What type of warranty typically comes with 3D roofing shingles?
Warranty terms vary by manufacturer and material, but generally include coverage for defects in materials and workmanship for a significant period, often 20-30 years or more.